This section explains how Arm Fixed Virtual Platforms (FVP) can be used with Keil MDK tools for developing and debugging embedded applications on a local computer.
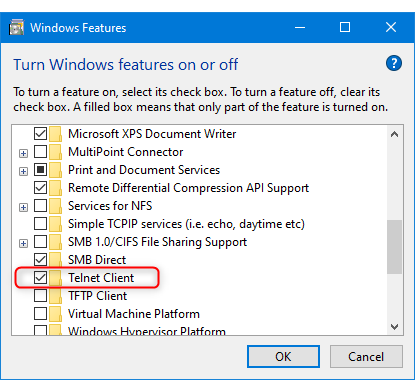
Two important configuration areas need special attention in MDK projects for Arm FVPs:
Table below lists the Cortex-M cores supported with Arm Virtual Hardware, corresponding device names, the CMSIS Pack with device support, as well as simulation models provided with MDK.
| Arm Cortex-M core | AVH Device name | CMSIS Pack with device definition | FVP model in MDK 1 | Description |
|---|---|---|---|---|
| Cortex-M0 | CMSDK_CM0_VHT | Keil.V2M-MPS2_CMx_BSP from v1.8.0 | VHT_MPS2_Cortex-M0.exe | CPU with Cortex-M0 core |
| Cortex-M0+ | CMSDK_CM0plus_VHT | Keil.V2M-MPS2_CMx_BSP from v1.8.0 | VHT_MPS2_Cortex-M0plus.exe | CPU with Cortex-M0+ core |
| Cortex-M3 | CMSDK_CM3_VHT | Keil.V2M-MPS2_CMx_BSP from v1.8.0 | VHT_MPS2_Cortex-M3.exe | CPU with Cortex-M3 core |
| Cortex-M4 | CMSDK_CM4_VHT | Keil.V2M-MPS2_CMx_BSP from v1.8.0 | VHT_MPS2_Cortex-M4.exe | CPU with Cortex-M4 core |
| Cortex-M4, FP | CMSDK_CM4_FP_VHT | Keil.V2M-MPS2_CMx_BSP from v1.8.0 | VHT_MPS2_Cortex-M4.exe | CPU with Cortex-M4 core and Floating Point Unit (FPU) support |
| Cortex-M7 | CMSDK_CM7_VHT | Keil.V2M-MPS2_CMx_BSP from v1.8.0 | VHT_MPS2_Cortex-M7.exe | CPU with Cortex-M7 core |
| Cortex-M7, FP(SP) | CMSDK_CM7_SP_VHT | Keil.V2M-MPS2_CMx_BSP from v1.8.0 | VHT_MPS2_Cortex-M7.exe | CPU with Cortex-M7 core and Single Precision FPU support |
| Cortex-M7, FP(DP) | CMSDK_CM7_DP_VHT | Keil.V2M-MPS2_CMx_BSP from v1.8.0 | VHT_MPS2_Cortex-M7.exe | CPU with Cortex-M7 core and Double Precision FPU support |
| Cortex-M23 | IOTKit_CM23_VHT | Keil.V2M-MPS2_IOTKit_BSP from v1.5.0 | VHT_MPS2_Cortex-M23.exe | CPU with Cortex-M23 core |
| Cortex-M33 | IOTKit_CM33_VHT | Keil.V2M-MPS2_IOTKit_BSP from v1.5.0 | VHT_MPS2_Cortex-M33.exe | CPU with Cortex-M33 core |
| Cortex-M33, FP | IOTKit_CM33_FP_VHT | Keil.V2M-MPS2_IOTKit_BSP from v1.5.0 | VHT_MPS2_Cortex-M33.exe | CPU with Cortex-M33 core and Floating Point Unit (FPU) support |
| Cortex-M55 | SSE-300-MPS3 | ARM.V2M_MPS3_SSE_300_BSP from v1.2.0 | VHT_MPS3_Corstone_SSE-300.exe VHT_Corstone_SSE-300_Ethos-U55.exe VHT_Corstone_SSE-300_Ethos-U65.exe | Corstone-300 SoC with Cortex-M55. Same device definition is used, but a model shall be selected depending on the required microNPU (none, Ethos-U55 or Ethos-U65) |
| Cortex-M85 | SSE-310-MPS3 | not available yet | VHT_Corstone_SSE-310.exe | CPU with Cortex-M85 core |
1 The Fixed Virtual Platforms can be found in the
/ARM/VHT/folder in the MDK installation directory as used for Tools Installation, for example,C:/Keil_v5/ARM/VHT/.
AVH device support is implemented with the same CMSIS principles as used for real hardware targets and explained in CMSIS Pack and CMSIS-Core(M).
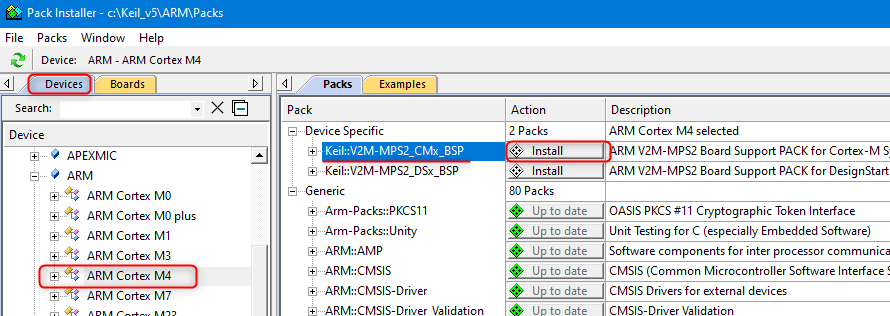
When opening an existing MDK project or importing it from a .cprj file you will be asked if any missing packs required by the project shall be installed. If you agree to that, also the necessary pack with device definition for the target device used in the project will be automatically installed.
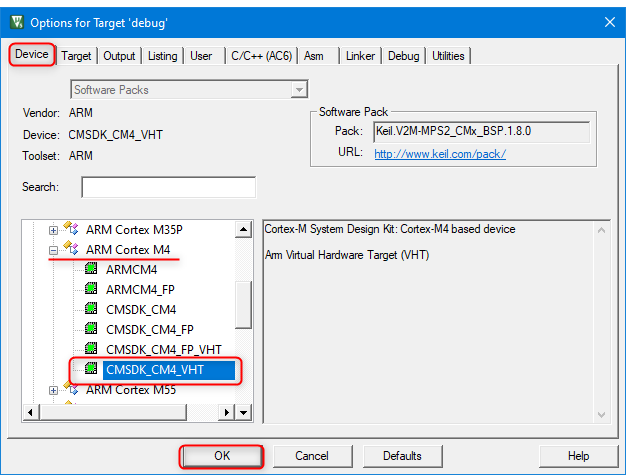
When creating a new project or when changing the target in an existing project you need to select an FVP target as follows:
Perform the following steps to configure execution and debug of an MDK project on an AVH device:
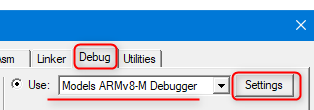
-f option). A correct configuration for Corestone-300 can be as follows: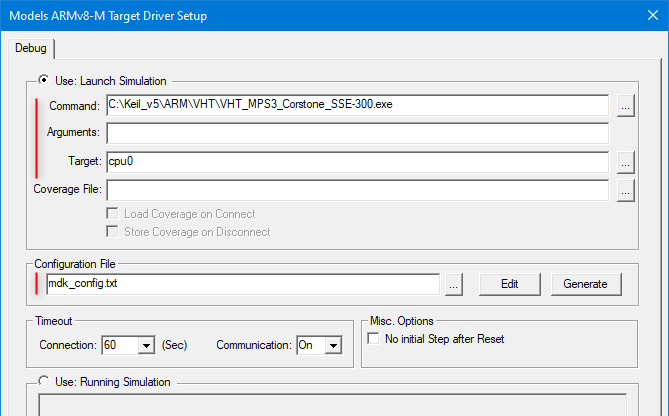
CORE_CLK to the same value as specified for the core_clk.mul parameter in the model configuration file. This ensures that the timing for MDK displays is correctly calculated in synch with the simulation. Edit button can be used to view and modify the file in the µVision editor. Figure below shows the example configuration and content of the files used, mdk_fvp_config.txt and mdk_fvp_init.ini: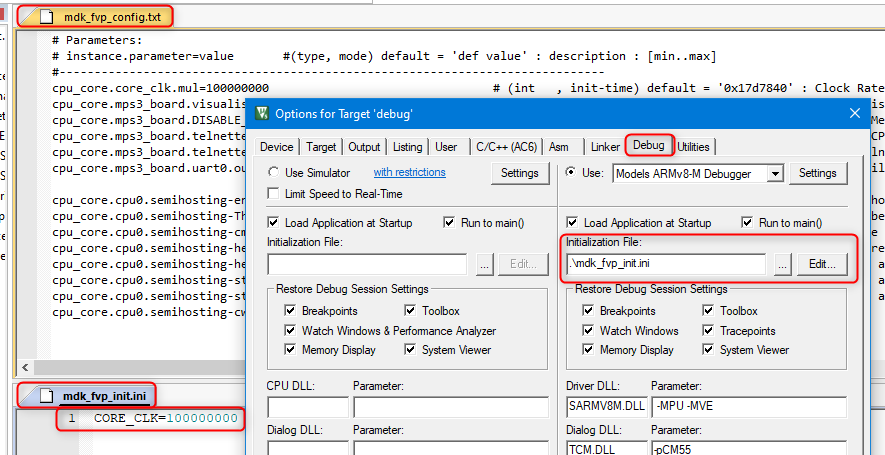
Universal .cprj format is required for building the program with Arm Virtual Hardware cloud environment. So it is important to keep the MDK project files and the cprj file synchronized. For that after saving modifications in the MDK project go to the µVision menu Project - Export and select Save project to CPRJ format.
Project build and debug on an AVH device can be done in the similar way as any other Keil MDK project:
F7 hotkey).Ctrl-F5). The model executable window should pop up (with C:\WINDOWS\system32\cmd.exe) but it will stay empty during the session.