 |
CMSIS-Zone
Version 1.1.0
System Resource Management
|
 |
CMSIS-Zone
Version 1.1.0
System Resource Management
|
The CMSIS-Zone utility is part of the CMSIS-Pack Eclipse Plug-ins.
The following steps explain the setup of an Eclipse enviornment with CMSIS-Zone:
Make sure that the path to the \bin folder in the Java installation is added to the PATH environment variable.
Launch Eclipse and
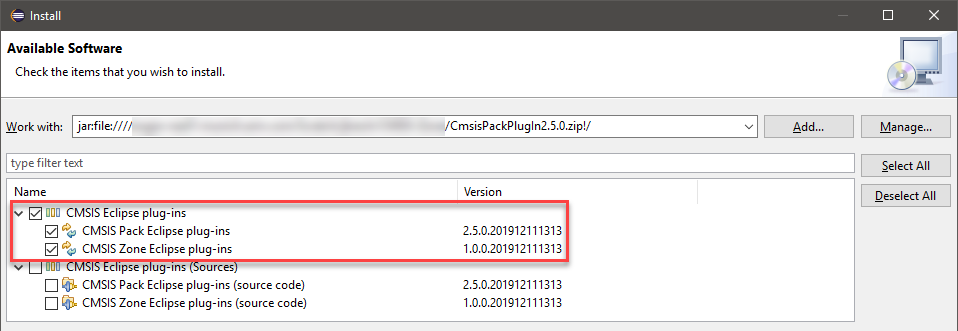
In the dialog Available Software select the CMSIS Eclipse plug-ins as shown below. The click Next and accept the license agreement.

Setup CMSIS Pack root folder in Eclipse
Open the dialog Window - Preferences and select directory for the CMSIS Packs repository on your computer:

The standard setting is C:\users\username\AppData\Local\Arm\Packs, but you may use the same directory as for MDK and select: C:\Keil_v5\MDK\ARM\PACK.