|
CMSIS-RTOS2
Version 2.1.3
Real-Time Operating System: API and RTX Reference Implementation
|
|
CMSIS-RTOS2
Version 2.1.3
Real-Time Operating System: API and RTX Reference Implementation
|
The steps to create a microcontroller application using RTX5 are:
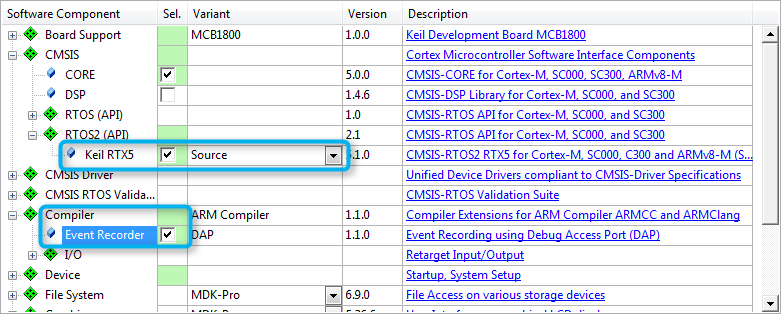
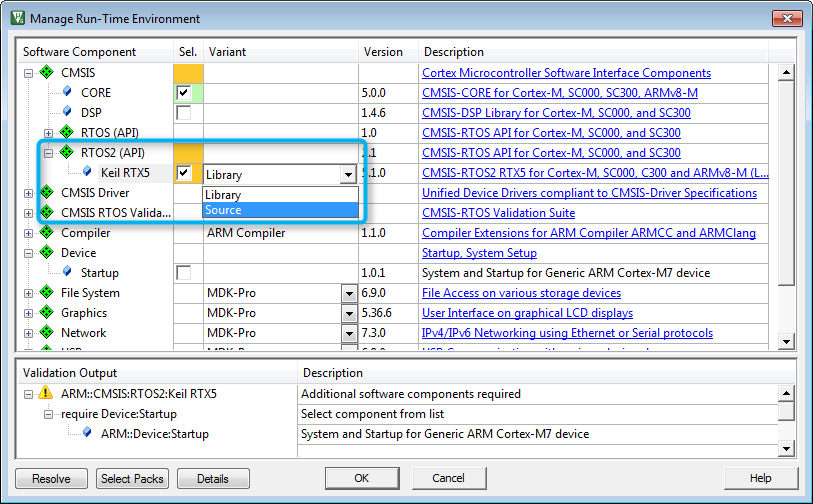
In the Manage Run-Time Environment window, select CMSIS::CORE and CMSIS::RTOS2 (API)::Keil RTX5. You can choose to either add RTX as a library (Variant: Library) or to add the full source code (Variant: Source - required if using the Event Recorder):
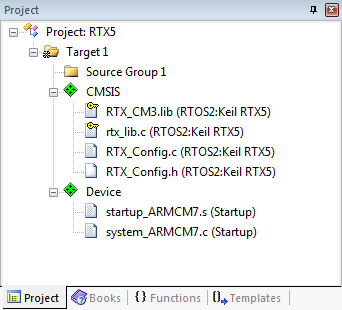
Click OK. In the Project window, you will see the files that have been automatically added to you project, such as RTX_Config.h, RTX_Config.c, the library or the source code files, as well as the system and startup files:
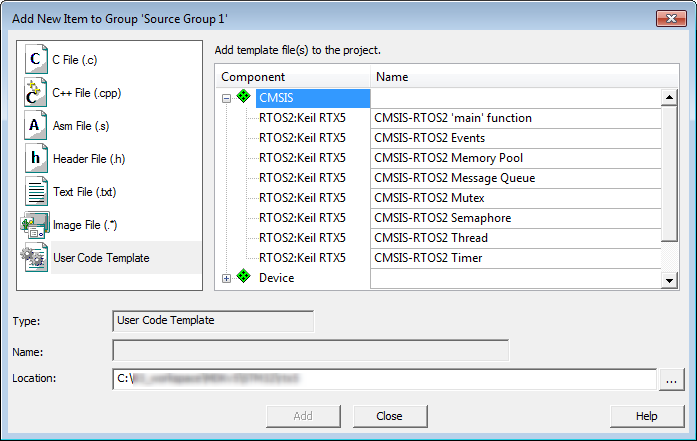
You can add template files to the project by right-clicking on Source Group 1 and selecting Add New Item to 'Source Group 1'. In the new window, click on User Code Template. On the right-hand side you will see all available template files for CMSIS-RTOS RTX:
Cortex-A based microcontrollers are less unified with respect to the interrupt and timer implementations used compared to M-class devices. Thus RTX requires additional components when an A-class device is used, namely IRQ Controller (API) and OS Tick (API) implementations.
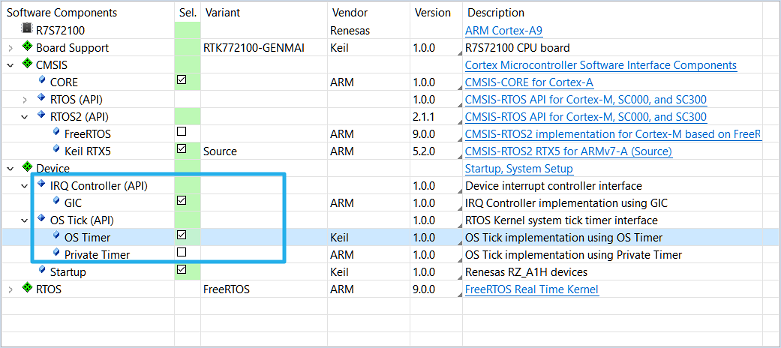
The default implementations provided along with CMSIS are
For devices not implementing GIC, PTIM nor GTIM please refer to the according device family pack and select the proper implementations.
On Cortex-M processors, the RTX5 kernel uses the following interrupt exceptions. The table below also lists the priorities that must be assigned to these interrupts.
| Handler | Priority | Interrupt/Exception |
|---|---|---|
| SysTick | lowest | Kernel system timer interrupt to generate periodic timer ticks |
| PendSV | lowest | PendSV (request for system-level service) when calling certain RTX functions from Handler mode |
| SVC | lowest+1 | Supervisor Call used to enter the RTOS kernel from Thread mode |
Other device interrupts can be used without limitation. For Arm Cortex-M3/M4/M7 /M23/M33/M35P processors, interrupts are never disabled by RTX Kernel.
Usage of interrupt priority grouping
Code Example
If you require some of the RTX specific functions in your application code, #include the header file rtx_os.h. This enables low-power and tick-less operation modes.
RTX5 interfaces to the Event Recorder to provide event information which helps you to understand and analyze the operation.
Select the Source variant of the software component CMSIS:RTOS2 (API):Keil RTX5.