 |
OpenGL ES SDK for Android
ARM Developer Center
|
 |
OpenGL ES SDK for Android
ARM Developer Center
|
Demonstration of ETC2 texture compression support in OpenGL ES 3.0.
It is assumed that you have read and understood all of the mechanisms described in Asset Loading,Simple Triangle and Texture Cube.

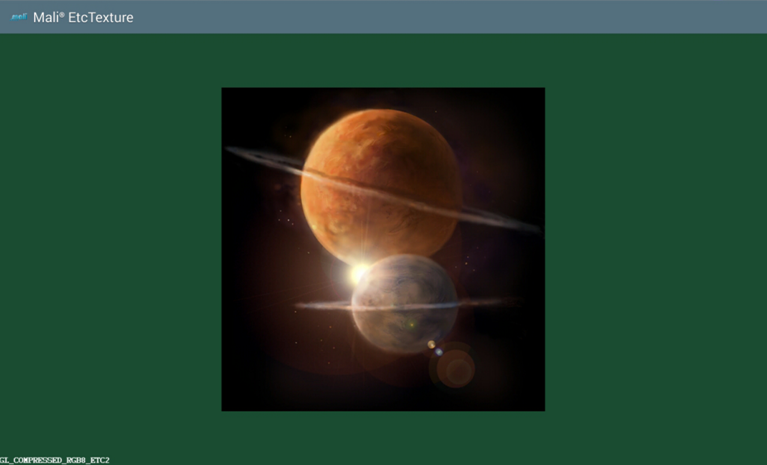
Compressed textures are loaded and displayed on the screen. The internal format of each texture is displayed at the bottom of the screen. The application cycles through all of the texture formats supported by OpenGL ES 3.0.
Formats:
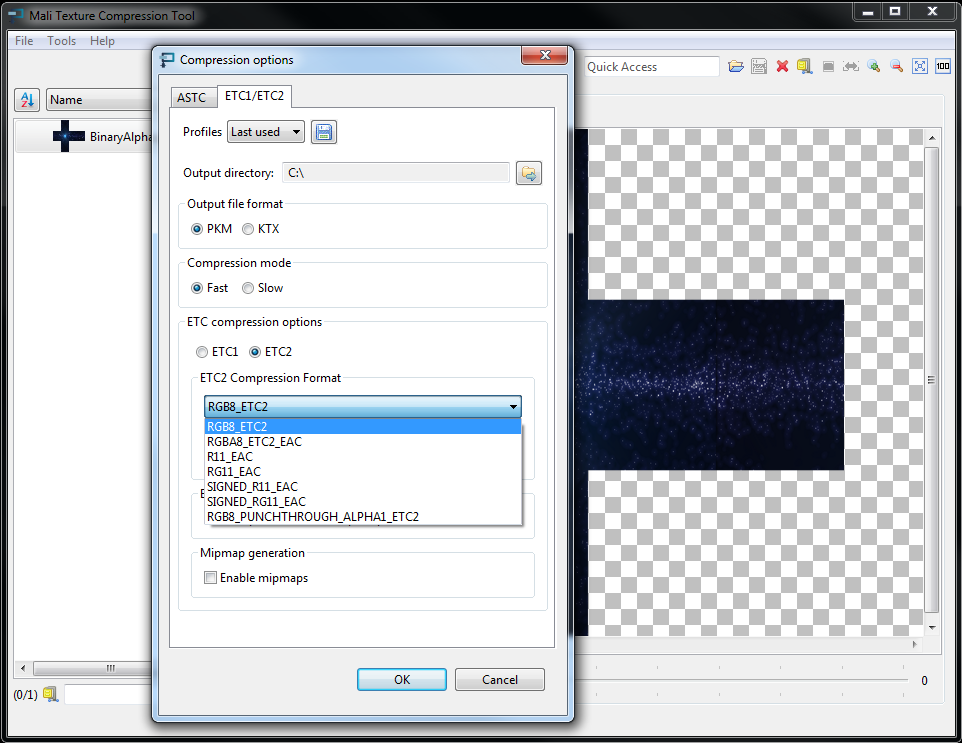
One of the possible ways of generating ETC2 images is to use the ARM Mali Texture Compression Tool which you can find here: http://malideveloper.arm.com. Once you have installed the tool, you can load any texture (stored in jpg, png or any other supported file formats). Then try to compress the image using the ETC2 compressor by selecting the compression format you are interested in. The result will be stored in a PKM file.

When you generate compressed textures, you can use them in the following steps.
In this section we will describe how to render a compressed texture onto the screen. For each ETC2 compression format supported by OpenGL ES 3.0, we will have a separate texture object. In the steps described below, we will however focus on dealing with a single texture object, as the same steps should be repeated for all the texture formats we want to display.
We need to start by generating a texture object ID.
Once we get one, we need to bind it to the GL_TEXTURE_2D target.
It is important to set the texture object's parameters, so that the texture will be properly displayed on the screen.
Now, we fill the texture object with data.
If the internalformat argument value is considered, you should use one of the ETC2 internalformats supported by OpenGL ES 3.0, which are listed below (which of course correspond to the internalformat of the compressed texture we are using here).
| Compressed Internal Format | Image Size |
|---|---|
| GL_COMPRESSED_R11_EAC | ceil(width/4) * ceil(height/4) * 8 |
| GL_COMPRESSED_SIGNED_R11_EAC | ceil(width/4) * ceil(height/4) * 8 |
| GL_COMPRESSED_RG11_EAC | ceil(width/4) * ceil(height/4) * 16 |
| GL_COMPRESSED_SIGNED_RG11_EAC | ceil(width/4) * ceil(height/4) * 16 |
| GL_COMPRESSED_RGB8_ETC2 | ceil(width/4) * ceil(height/4) * 8 |
| GL_COMPRESSED_SRGB8_ETC2 | ceil(width/4) * ceil(height/4) * 8 |
| GL_COMPRESSED_RGBA8_ETC2_EAC | ceil(width/4) * ceil(height/4) * 16 |
| GL_COMPRESSED_SRGB8_ALPHA8_ETC2_EAC | ceil(width/4) * ceil(height/4) * 16 |
| GL_COMPRESSED_RGB8_PUNCHTHROUGH_ALPHA1_ETC2 | ceil(width/4) * ceil(height/4) * 8 |
| GL_COMPRESSED_SRGB8_PUNCHTHROUGH_ALPHA1_ETC2 | ceil(width/4) * ceil(height/4) * 8 |
At this point there is one thing that is unclear: what values should be used for imageWidth, imageHeight, imageSize, imageData in glCompressedTexImage2D() call? Those values should correspond to the data retrieved from PKM file, as shown below.
The very first thing you should do is to set the pixel storage mode so that the proper alignment will be used whilst reading the texture images.
Then, you should open and read the PKM file as implemented in the functions presented below.
Once you get the result, you can use the retrieved data in the glCompressedTexImage2D() call as already mentioned in the previous section (Generate Texture Object).
In OpenGL ES, the basic geometry rendering technique is to render triangles. In our case, we want to render a simple quad onto which there will be a texture image applied.
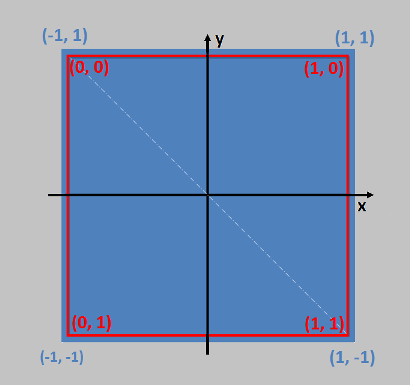
The first step is to generate vertex coordinates of the triangles that make up the quad (please note that we are interested in a quad in XY space).
Please look at the image below. The schema show coordinates we are using in the application.

This is defined as follows.
Coordinates of a triangles that are used to render a quad.
Corresponding texture UVs.
We will need array buffer objects to store the coordinates described above.
There is no OpenGL ES 3.0 rendering without program objects, so we should now focus on that. First of all, we need to:
Vertex shader code:
Fragment shader code
The next step is to set values for the attributes and uniforms we are using in the shaders. To do that, we need to retrieve their locations. In the API, we are calling glGetUniformLocation() with the ID of a program and name of the uniform used in the shaders given as arguments. The analogous situation is to call glGetAttribLocation(), but this time we are using the attribute name instead.
It is always a good idea to make sure that the uniform and attributes were found (which means that they are declared and used by the program object). If the returned value is equal to -1, then an attribute/uniform is considered inactive.
Once we are sure that retrieved locations are valid, we can set values for the uniforms and attributes.
By calling
we are telling OpenGL ES to use a texture object that is currently bound to the GL_TEXTURE_2D target at the GL_TEXTURE0 texture unit (if you are using GL_TEXTURE1 as the texture unit, the value for the uniform should equal 1) as an input to the program object.
We wanted the application to cycle through all of the texture formats supported by OpenGL ES 3.0, which is why we will be re-binding the textures many times. This is done as shown below.
How do we set values for attributes? The best way is to use Vertex Attrib Arrays. Do you remember the buffer objects we have created and filled with quad coordinates and texture UV data? We will use them now.
The last thing to do is to issue the draw call.