GetStarted example demonstrates how to setup a Continuous Integration (CI) workflow for testing and debugging embedded applications using Arm Virtual Hardware (AVH). The project is maintained in the GitHub repository github.com/ARM-software/AVH-GetStarted that also contains detailed description of the example.
This chapter provides step-by-step guide through the CI workflow operation and its setup.
The AVH GetStarted example implements common steps in the CI workflow as shown on the figure below and explained in subsequent sections.

Following is required to reproduce operation of the example project:
Other necessary software items are available free-of-charge and their installation is described in the related steps.
The AVH GetStarted embedded program implements a set of unit tests for validating operation of a simple function that is expected to return the sum value of two integer arguments. The example uses Unity Framework for test implementation and execution, however, the demonstrated concept is universal and can be applied to a different testing framework as well.
Initial project repository setup should follow a standard git process for either [creating a new repo] (https://docs.github.com/en/get-started/quickstart/create-a-repo) or forking an existing one. The AVH GetStarted repository is set up as a GitHub template repository so it is very easy to create own repository from it:
AVH-GetStarted.`https://github.com/<YourGitHubName>/AVH-GetStarted` repository, where <YourGitHubName> corresponds your GitHub user name.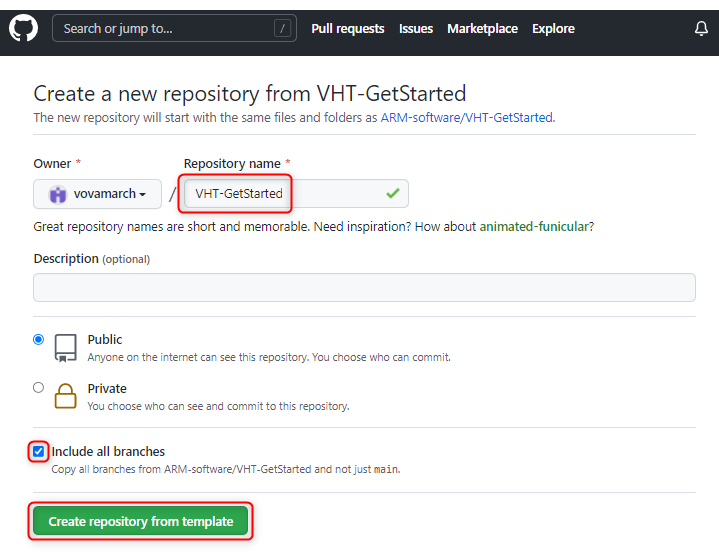
Local repository setup
If the repository is present on GitHub, it can be easily copied onto local PC.
git clone https://github.com/<YourGitHubName>/AVH-GetStarted
This copies the content of the main branch to on your local drive. The badges branch is present in the GitHub repository but is not required for local use.
Project setup
The main.c file in the example implements a set of unit tests validating the application function int my_sum(int a, int b). The implementation relies on the Unity Framework that is added to the example as a software component with the Unity software pack. In the example, the test_my_sum_fail demonstrates a test failure and section Analyze failures explains how to analyze CI output for debugging such failed tests.
The implementation of tests in the example can be considered as a template for adding more tests, covering other functions, or setting up unit testing in a custom project. Please refer to the documentation in [Unity GitHub] (https://github.com/ThrowTheSwitch/Unity) for further details and more complex examples.
Redirect stdout
By default Unity uses putchar for print out. Keil MDK does not support semihosting and hence standard output needs to be redirected to become visible during debug session. Redirect I/O component enables several mechanisms for that. In our example stdout output gets redirected to a UART interface.
Build and Run the example in Keil MDK
Build and execute the program in Keil MDK in the same way as any other project. Refer to Program Build and Debug for additional description.
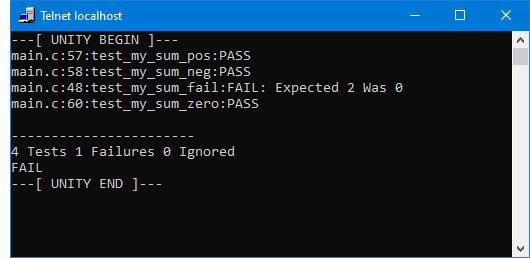
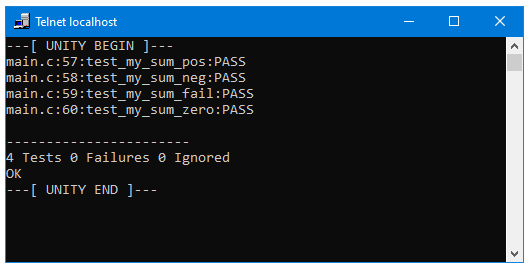
The GetStarted example is configured to open a local Telnet console automatically when the debug session starts. By default the following output shall be observed there, indicating an intentional failure in test_my_sum_fail:
Export project to CPRJ format
The GetStarted example is also described in basic.debug.cprj file using universal .cprj format that gets used in command-line CI environments.
For correct workflow operation it is important to keep the MDK project uvprojx file and the cprj file synchronized. For that after saving modifications in the MDK project go to the µVision menu Project - Export and select Save project to CPRJ format.
As common for many projects, the CI pipeline for the AVH Get Started repository is triggered on every code change via push and pull requests. In our example this is explicitly limited to the main branch only.
The CI implementation in this example is implemented with GitHub Actions. AVH Client manages the connection between the GitHub repository and the Arm Virtual Hardware AMI instance in AWS, and configures the actions to be performed on the AMI, such as program build and execution.
Subsections below explain the setup for the AWS and GitHub Actions.
On the AWS side several items shall be setup to enable execution of example CI pipeline on Arm Virtual Hardware AMI.
Arm Virtual Hardware AMI subscription
AWS resources setup
Ensure that a Key Pair is available for use with EC2.
By default the AVH GetStarted example expects a key pair with name common to create an EC2 instance (with line ssh_key_name: common in basic.yml file).
common key pair exists then click on Create key pair button. 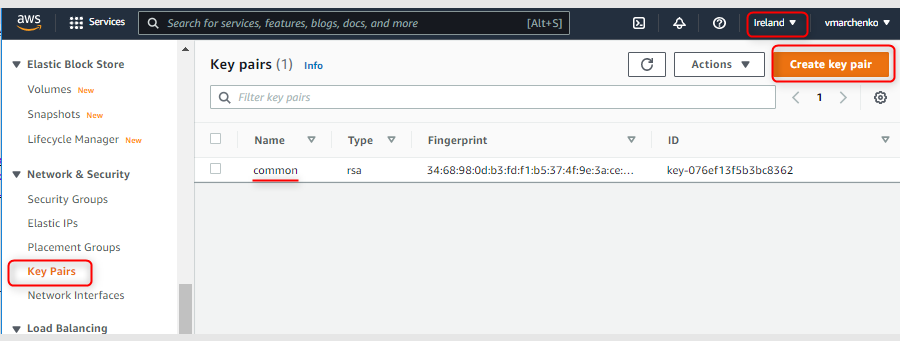
common as Name. Other settings can be kept at default values.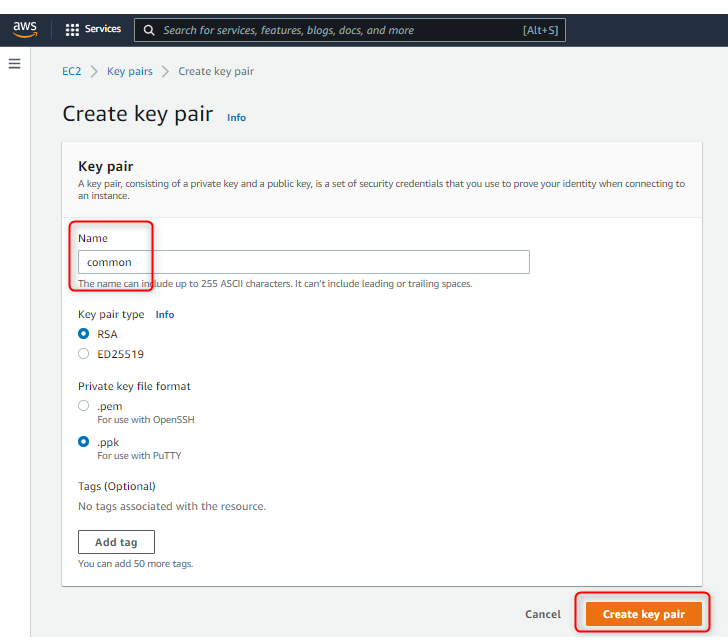
Section Run AMI with GitHub Actions introduces the concept and explains it in details.
The GitHub Action in this example is implemented in the ./.github/workflows/basic.yml file using corresponding YAML syntax for GitHub workflows.
Add GitHub Secrets
Several parameters need to be configured in the repository as GitHub Secrets to enable communication with your AWS account. For that:
| Secret Name | Value for your AVH-GetStarted repository | Description |
|---|---|---|
| AWS_IAM_PROFILE | The value of AVHIAMProfile from the output of AWS resources setup. | The IAM Instance Profile to be used for AWS access. |
| AWS_ACCESS_KEY_ID AWS_SECRET_ACCESS_KEY | The values of AVHAccessKeyId and AVHSecretAccessKey respectively from the output of AWS resources setup. | Access key pair for the AWS account (as IAM user) that shall be used by the CI workflow for AWS access. |
| AWS_S3_BUCKET_NAME | The value of AVHS3BucketName from the output of AWS resources setup. | The name of the S3 storage bucket to be used for data exchange between GitHub and Arm Virtual Hardware AMI. |
| AWS_SECURITY_GROUP_ID | The value of AVHEC2SecurityGroupId from the output of AWS resources setup. | The id of the VPC security group to add the EC2 instance to. Shall have format sg-xxxxxxxx. |
| AWS_DEFAULT_REGION | Use the same region as was used for AWS setup. | The data center region the Arm Virtual Hardware AMI will be run on. For example eu-west-1. |
| AWS_SUBNET_ID | Obtain a value as described in View your subnet. | The id of the VPC subnet to connect the EC2 instance to. Shall have format subnet-xxxxxxxx. |
CI pipeline gets executed automatically on every code change in the main branch and execution results can be observed on the repository GitHub page.
Select the workflow and its runs will be displayed on the page. Note that right after copying the repository the list is empty because no workflows are executed yet.
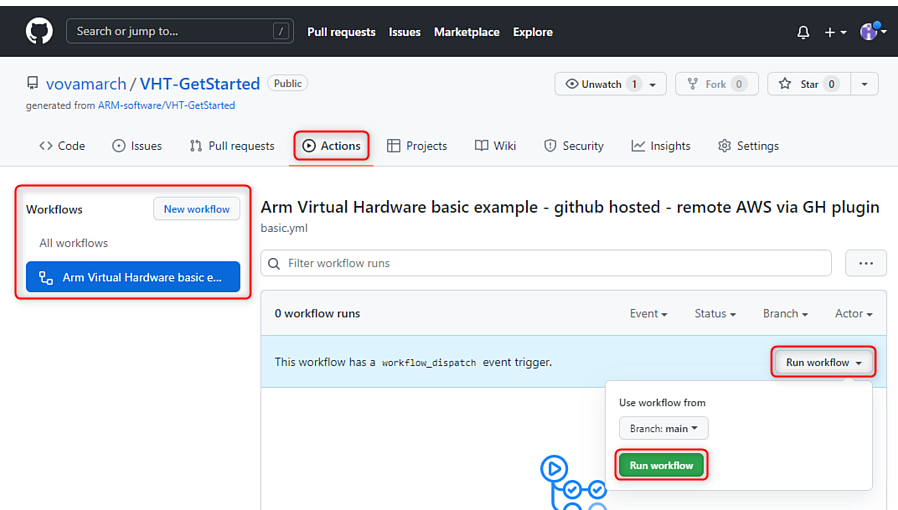

GitHub Documentation gives an overview about monitoring and troubleshooting options available for GitHub Actions.
Steps below guide through the analysis for AVH GetStarted example.
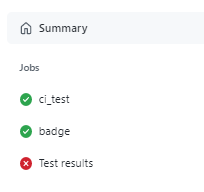
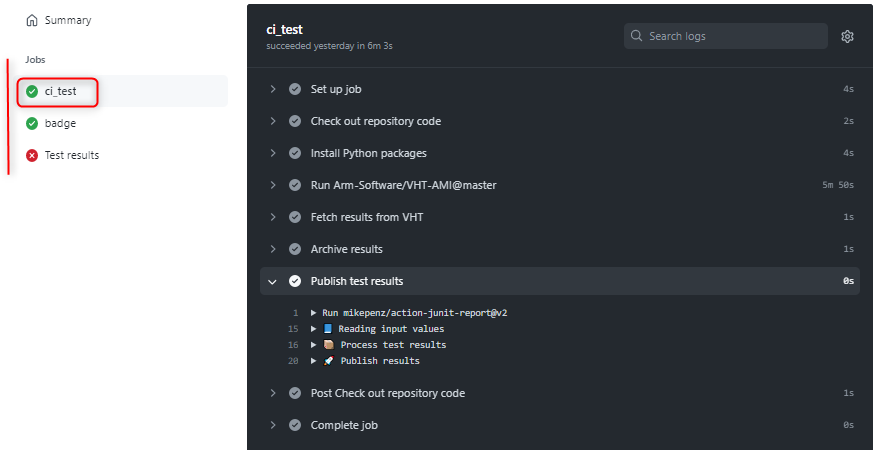
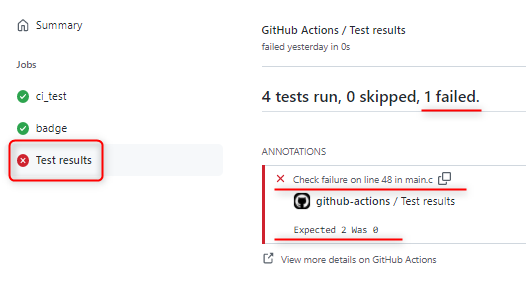
This allows to find the failure quickly. In our example it is a trivial one, introduced on purpose in the example code.
2 with the correct 0: TEST_ASSERT_EQUAL_INT(0, sum);
  git commit basic/main.c -m "Fixed test_my_sum_fail"
  git push
